How to Control Shaders with Scripts in Unity
In the world of game development, achieving awesome visual effects often involves working with shaders. In Unity, you can create stunning visuals using Shader Graph, but what if you want to change shader properties dynamically during gameplay? In this blog post, we'll explore how to control shaders with scripts in Unity. We'll focus on a specific example: changing the curvature of a road created with Shader Graph using code. While our example relates to a road in a game, the techniques we discuss have broad applications for working with shaders in various scenarios.
Watch the Video: How to Control Shaders with Scripts
Understanding the Basics of Shader Graph
Before we dive into the details, it's essential to grasp a fundamental concept: when you want to change shader values in code, those values need to be exposed as properties. Properties allow you to access and manipulate shader values in your scripts. Unity automatically generates references for these properties, making it easy to work with them in code.
Creating a Dynamic Road:
To illustrate this concept, we'll work on creating a dynamic road with a bending effect controlled by shader properties. Currently, we have a road with three materials: one for the road itself, one for the buses, and one for the walls. The goal is to change the curvature of the road during gameplay.
Exposing Shader Properties
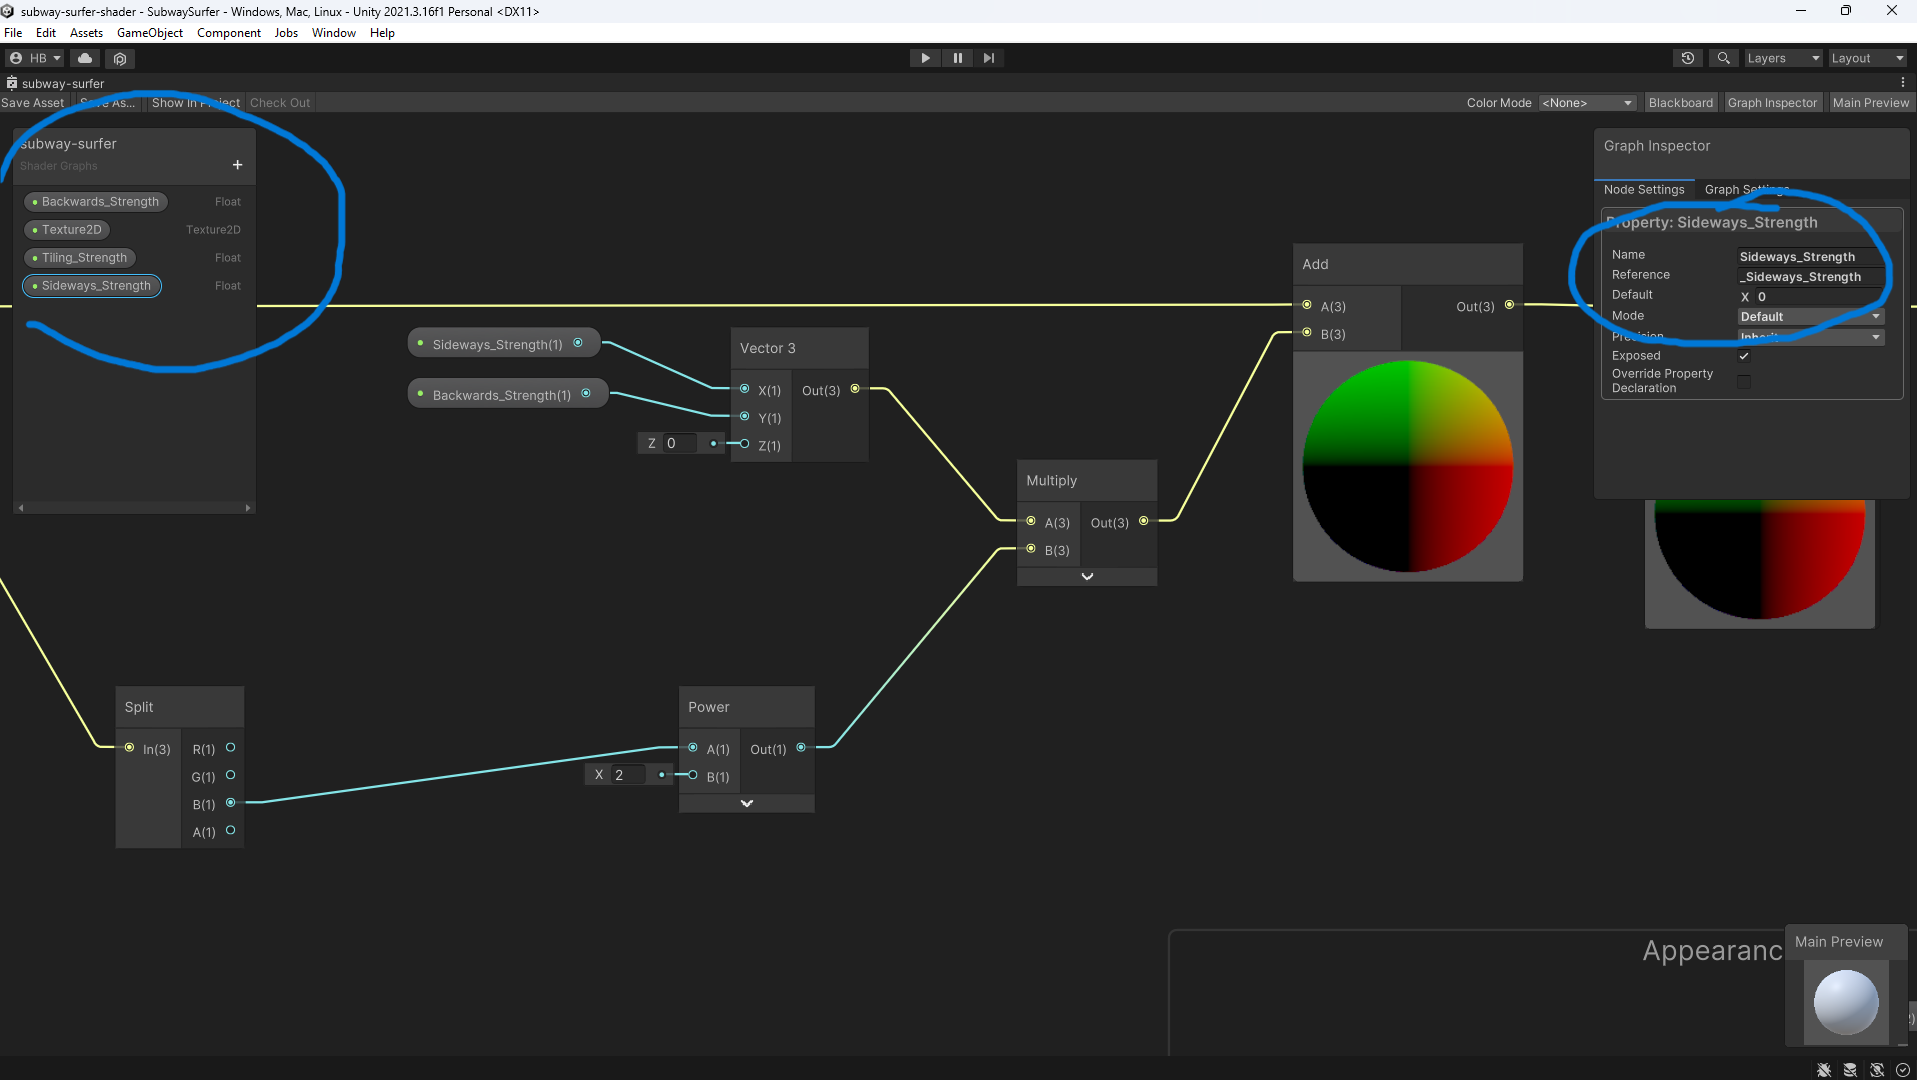
In Unity, open your shader graph and identify the properties you want to control through code. For instance, in my shader, we can control the bend of the road with a float value, which I'm naming "Sideways_Strength." Make sure to expose it as a property.
How to turn a value into a property in shader graph:
Click on value > Right Click > Convert to > Property
Properties will show up by default on the left hand side of shader graph. When you click into a property, you'll see the reference that Unity has created for you, which is what you will use to reference in your scripts.
Setting Up Triggers
To trigger the shader property changes, we'll need to set up invisible walls as triggers. To do this, we can create box colliders and check "isTrigger". This will allow the player to pass through the collider. When the player passes through these walls, they'll signal a change in the road's curvature. Create a new tag for these triggers (e.g., "Curve") and apply it to the relevant objects.
Scripting for Dynamic Changes
To implement the dynamic change in curvature, you'll need a script. In this scenario, I'm attaching this script to the player object. In the script, you'll create a reference to the affected materials.
Smooth Transition with Coroutines
To ensure a smooth transition between curvature values, we'll use coroutines. Coroutines allow you to gradually move from the current shader property value to a target value over time. We'll introduce variables for tracking elapsed time and the transition duration (lerp time).
Applying Changes to Materials
With the coroutines in place, you can iterate through all the materials you want to change using a foreach loop. For each material, set the "Sideways_Strength" property to the current value calculated using the Mathf.Lerp function.
Controlling When to Trigger Changes
To control when to trigger the shader property changes, use a boolean variable (e.g., "isComplete"). Set this variable to "true" initially and update it to "false" when the coroutine runs. This way, you can ensure that changes won't overlap or occur prematurely.
Initialization and Accessors
Finally, ensure that you initialize the shader property correctly at the start of the game. You can do this by iterating through the materials and fetching their initial "Sideways_Strength" values and set it as the current value.
Takeaways
The key takeaway is that shader values must be exposed as properties to be accessible in code. By using coroutines and scripting, you can create smooth transitions and apply shader property changes as needed. These techniques can be applied to various scenarios, making your games visually engaging and interactive. Happy game development!