How to Export Models from Blender into Unity
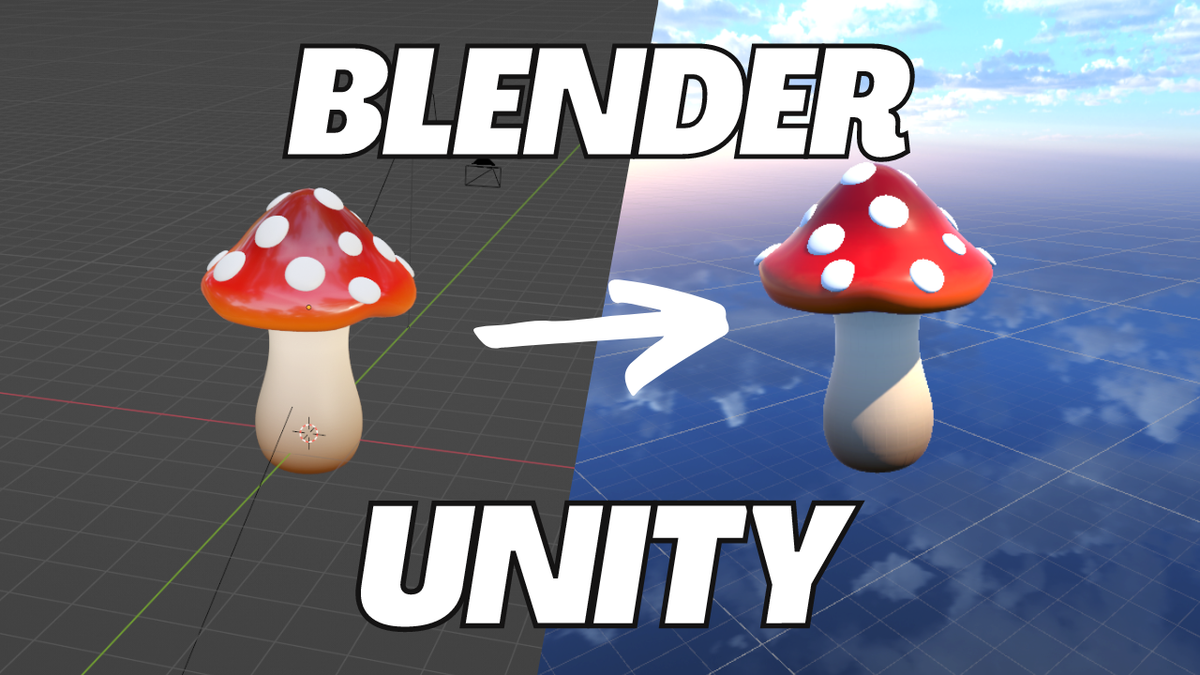
If you've ever tried to export a model to Unity from Blender, you know that getting models into your Unity project can be very challenging, And this is because Unity does not understand blender's built-in node system. But it understands some of it, which can be extremely confusing when you're exporting your assets. So you can create these awesome models with cool effects and materials but when you export them...it doesn't translate the same.
Why is it Hard to Export from Blender to Unity?
It's important to realize the context here. Blender is a tool in and of itself, and that has many uses across many platforms. It's not only used for game development but also for movies, visual effects, and 3D printing. There are also people, who, just enjoy the fun of making and posting their own 3d scenes for fun. With that in mind, Blender has to support a wide variety of formats for export, but it also has many built-in features that are made just for use inside of Blender.
Blender's geometry node system is one of these built-in features, which is used to make materials, textures, and effects inside of Blender. However, if we were to try and export a model that uses materials with the node system, they will not show up correctly. This is because Unity (nor any other program) is going to understand Blender's node system.
That being said, how are game developers getting these amazingly complex and intricate models into their games? Simply put, these game developers are taking something that Blender understands and translating it into something that Unity understands.
This process is called texture baking.
What is Texture Baking?
Texture baking is a process where you take a 3d model and distill all of its procedural information into 2d images.
How to Texture Bake an Object in Blender
Now that we know our objects need to be converted into a 2d image file to be recognizable in Unity, we need to tell Blender how we want those images to wrap around our objects in a process called unwrapping.
With your object selected, go to your UV Editing tab. In the layout tab, if we tab into edit mode and hit "A" we can select the entire mesh. Now in our UV editing tab, if we hit "U" and select "Smart UV Project" this will unwrap our mesh and prepare it for texture baking.
Add some margins just in case to have some padding.
Texture Baking
In the shading tab, a couple of things need to be added. Click "Shift A" to search for a new node, "Image Texture." Create a new file and name it appropriately. Next, with our object and image texture node selected, the following settings need to be in place:
- Render Engine: Cycles
- Performance: Auto Detect
- Bake Settings > Change "Combined" to "Diffuse"
- Bake Settings > Only check "Color" since we don't need lighting
Then, hit "Bake"!
A progress bar should appear on the bottom, and as soon as the texture is done baking a preview of the image will be available on the left-hand-side.
Very important: Next to your new image, click on the icon dropdown to the left of the file name to save your image to your device, this will not work without this step!
Remember how I mentioned that Unity understands some of Blender's node system? Well, this comes into play right now because to see your new image material, it needs to be hooked up to a Principled BDSF node and a material output node. To make sure you're looking at the right material, we just select the material output node and that's the material we're currently viewing.
With that set up, all the other nodes should be deleted so as to not confuse Unity when the model is exported.
Converting Normal Maps
Now if you have a model that has a lot of texture, maybe some bumps and some dents, you're going to want a normal map, which you can achieve with the same exact process.
You'll repeat the same steps as above, except this time, you're going to change "diffuse" to "normal". Make sure that file is saved to your device as well.
Once baked, you can plug it into the "normal" slot on the principled BDSF node.
Exporting the Model
With the rest taken care of, we can now export this model as an FBX. FBX is usually the standard when it comes to game development.
File > Export > FBX
Different developers have different preferences here, but the default export works just fine. There may be a little cleanup involved when the model gets imported into Unity.
Once your file is exported, drag over your FBX model and all of the textures and normals into your Unity scene! Because we mapped unwrapped our objects and baked our textures, Unity should pick up on where your textures should be mapped to on your object.
Thanks for reading!
Other Videos:
How to Export Metallic Objects:
How to Export Normal Maps: